AI摘要:
本文介绍了IntelliJ IDEA中提高SpringBoot开发效率的几个实用技巧:快速创建SpringBoot启动类并自定义类名、一键配置数据库连接信息、快速添加SpringBoot父工程依赖,以及快速引入Web、MyBatis、MySQL和Lombok等常用依赖。
此内容根据文章生成,仅用于文章内容的解释与总结
1.快速写入代码片段
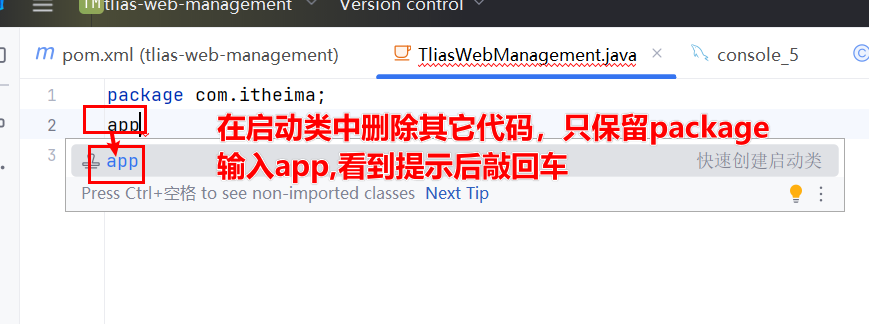
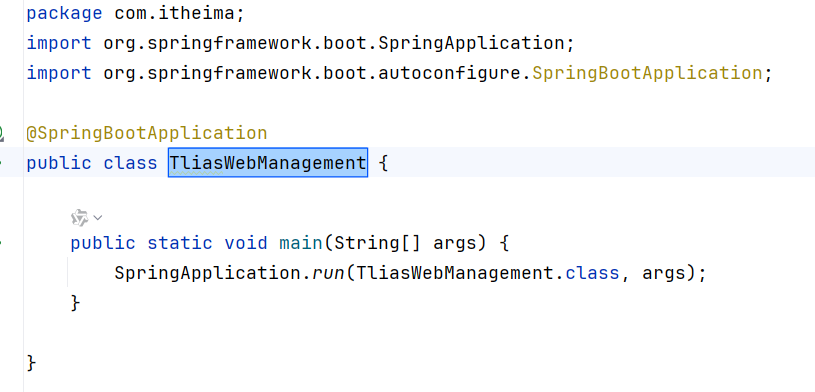
1.1 快速创建SpringBoot启动类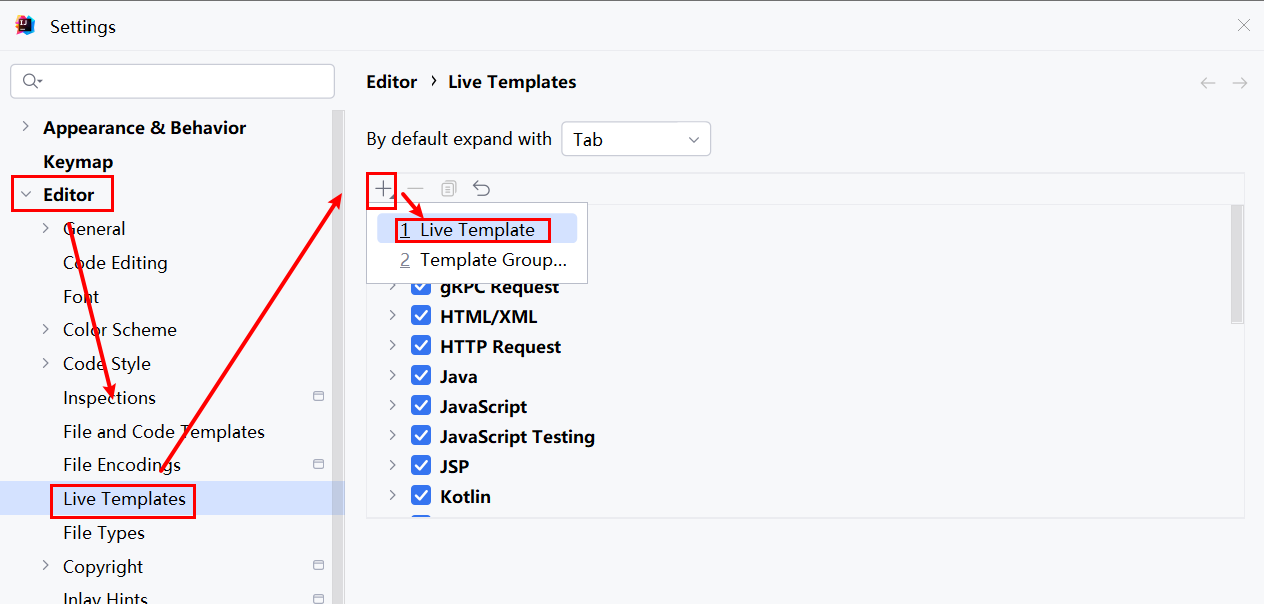
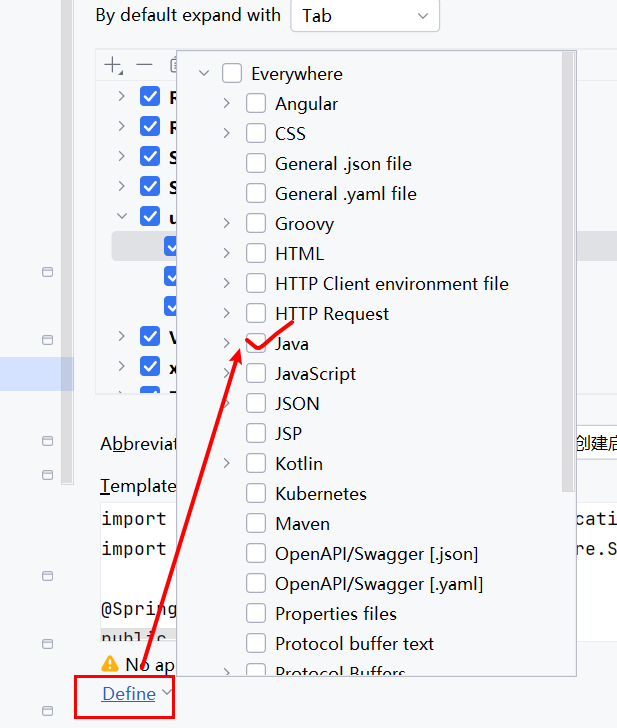
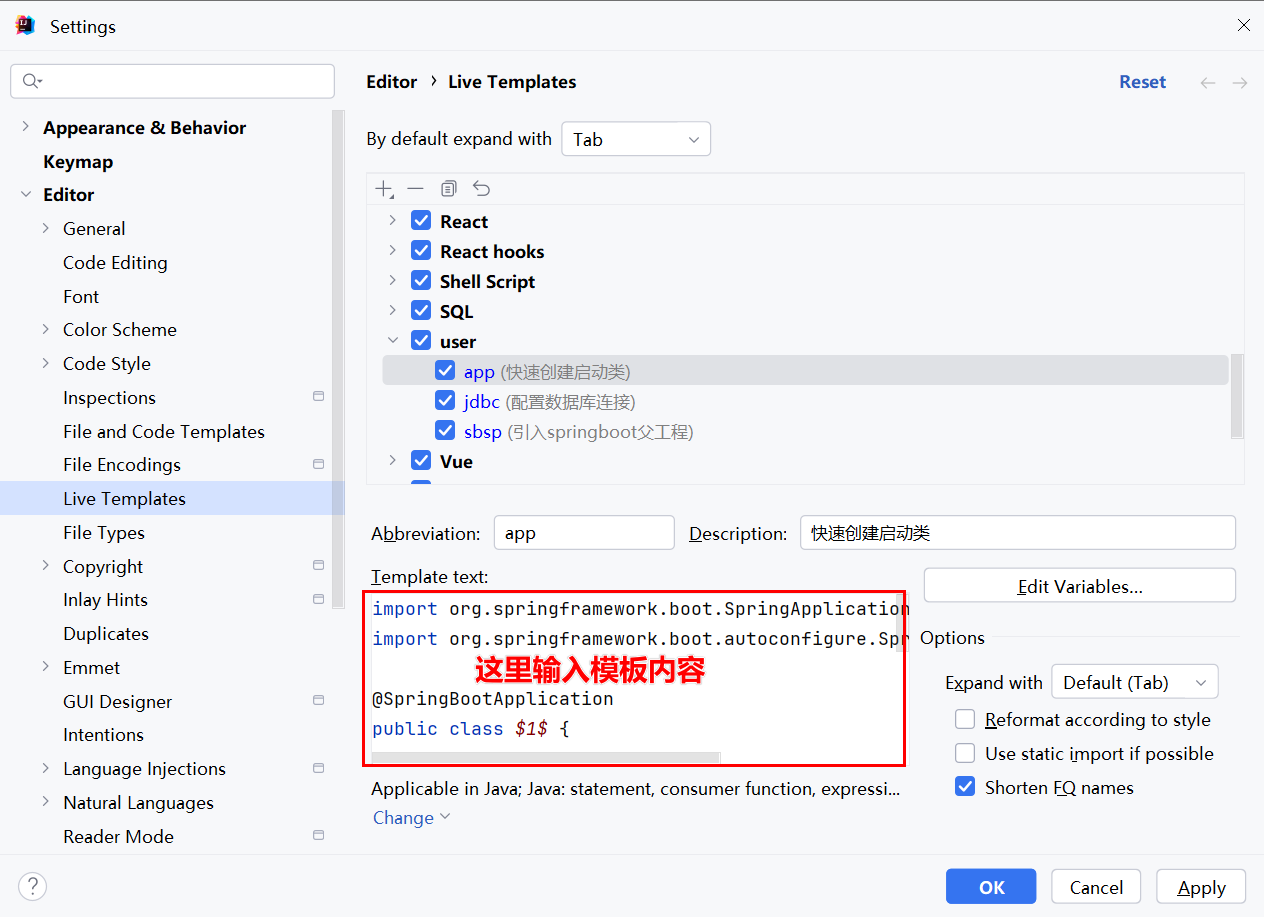
代码如下:
import org.springframework.boot.SpringApplication;
import org.springframework.boot.autoconfigure.SpringBootApplication;

@SpringBootApplication
public class $1$ {

    public static void main(String[] args) {
        SpringApplication.run($1$.class, args);
    }

}
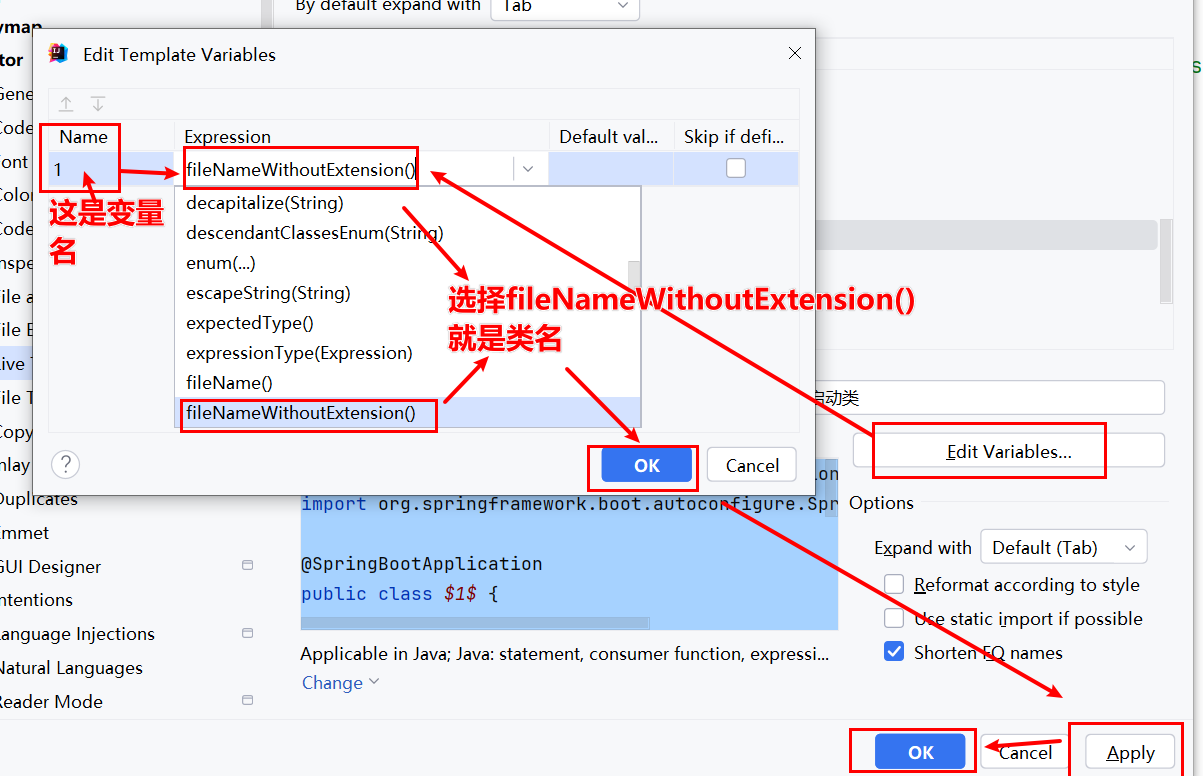
代码中的$1$代表定义一个变量名为1,随后我们给变量赋值
1.2快速配置数据库连接信息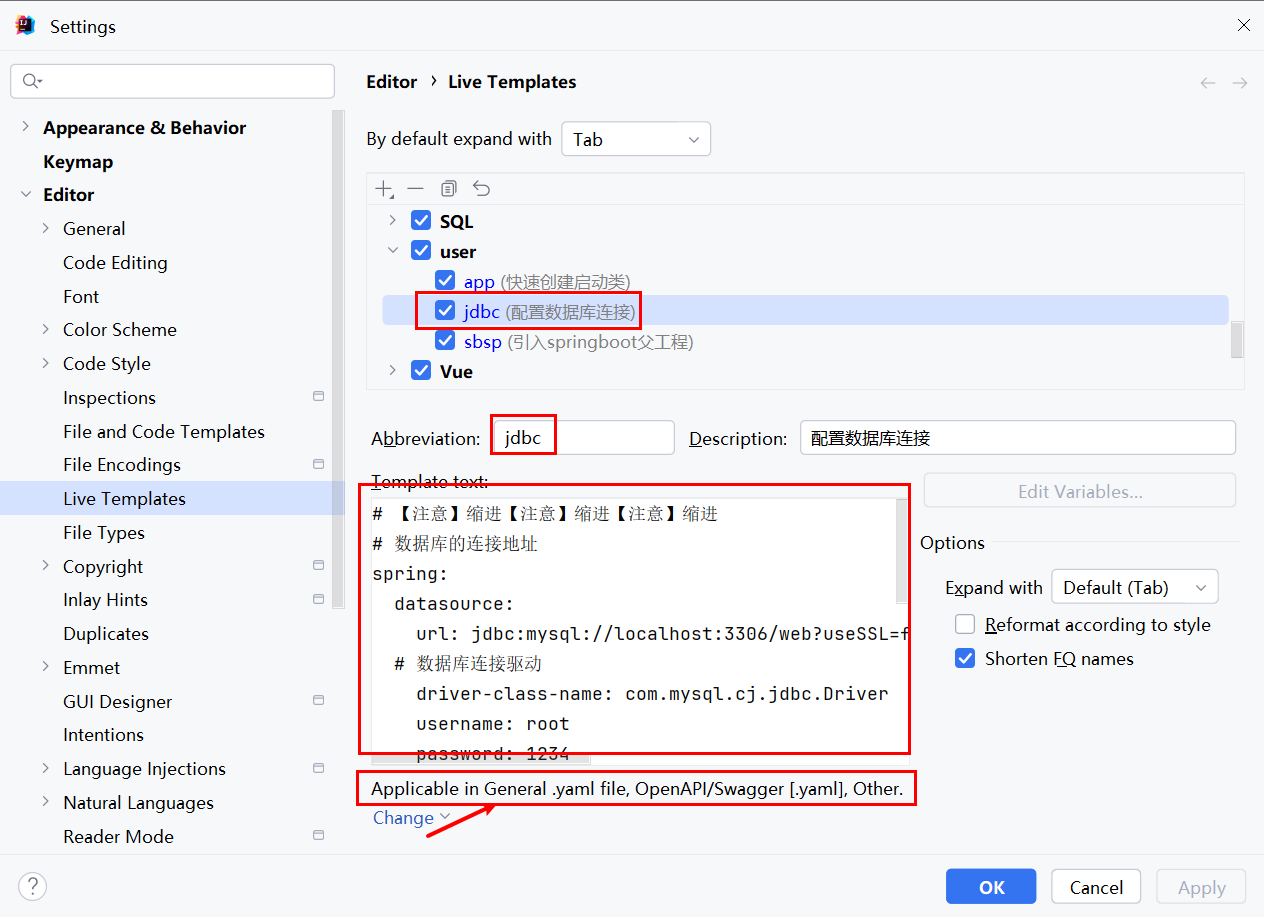
# 【注意】缩进【注意】缩进【注意】缩进
# 数据库的连接地址
spring:
  datasource:
    url: jdbc:mysql://localhost:3306/web?useSSL=false&serverTimezone=Asia/Shanghai&allowPublicKeyRetrieval=true
  # 数据库连接驱动
    driver-class-name: com.mysql.cj.jdbc.Driver
    username: root
    password: 1234
    type: com.alibaba.druid.pool.DruidDataSource
# mybatis打印sql日志信息
mybatis:
  configuration:
    log-impl: org.apache.ibatis.logging.stdout.StdOutImpl

  # mybatis中给实体取别名,类名,不是全限定类名
  type-aliases-package: com.itheima.pojo
1.3 快速引入springboot父工程
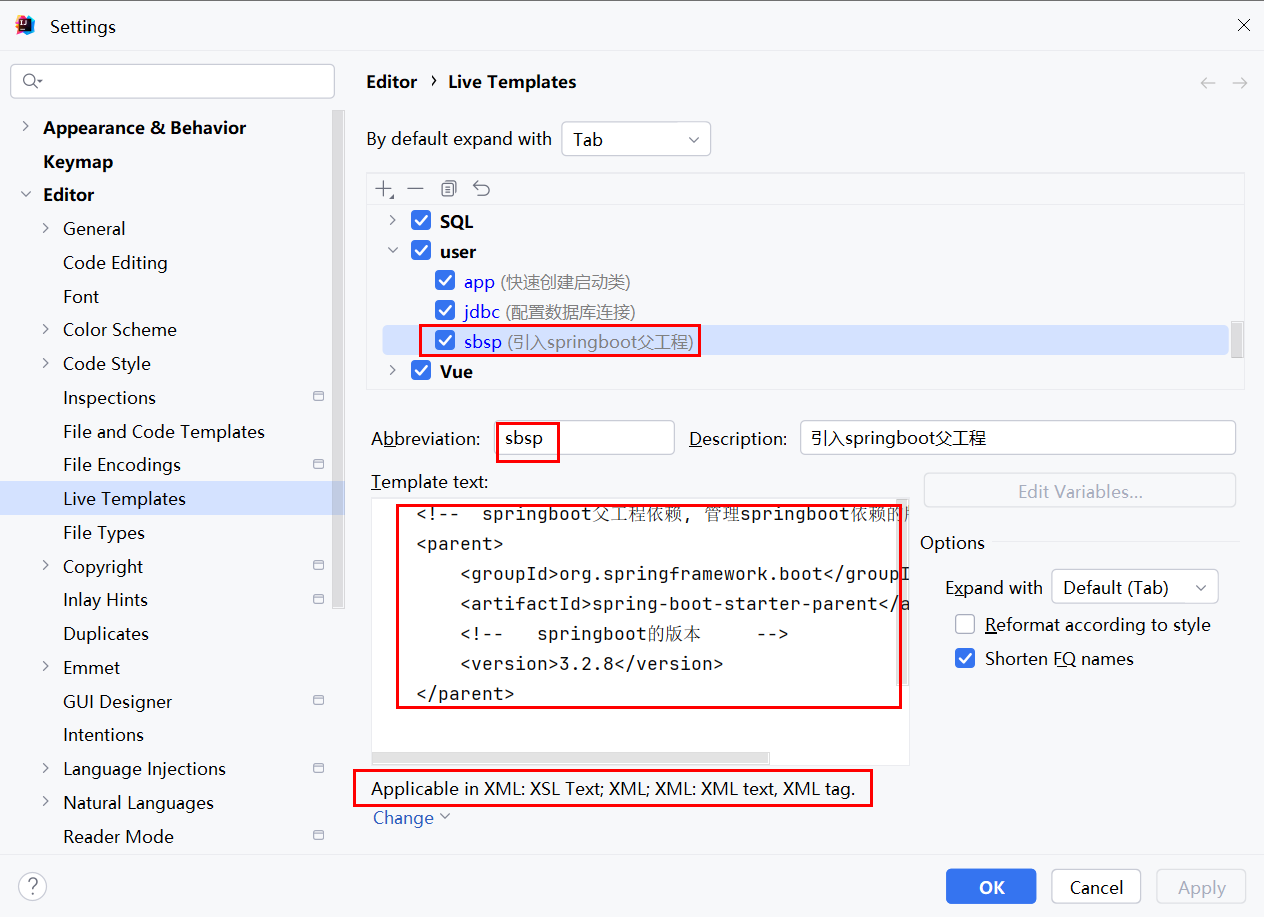
<!--  springboot父工程依赖, 管理springboot依赖的版本  -->
<parent>
    <groupId>org.springframework.boot</groupId>
    <artifactId>spring-boot-starter-parent</artifactId>
    <!--   springboot的版本     -->
    <version>3.2.8</version>
</parent>
1.4 快速引入springboot-web+Mybatis
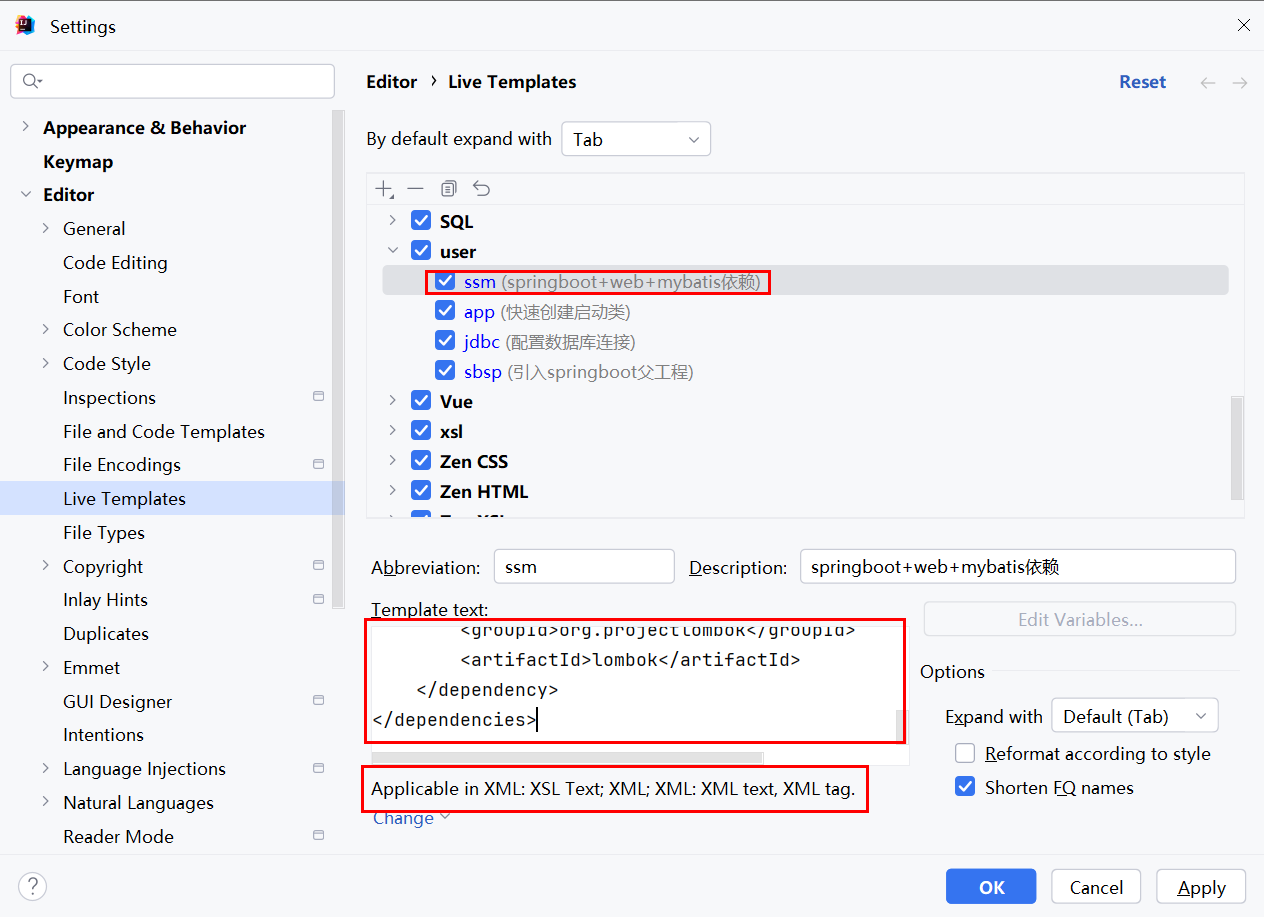
<dependencies>
<!--    web核心依赖    -->
    <dependency>
        <groupId>org.springframework.boot</groupId>
        <artifactId>spring-boot-starter-web</artifactId>
    </dependency>
<!--    Mybatis    -->
    <dependency>
        <groupId>org.mybatis.spring.boot</groupId>
        <artifactId>mybatis-spring-boot-starter</artifactId>
        <version>3.0.4</version>
    </dependency>
<!--    MySql驱动    -->
    <dependency>
        <groupId>com.mysql</groupId>
        <artifactId>mysql-connector-j</artifactId>
    </dependency>
<!--   lombok     -->
    <dependency>
        <groupId>org.projectlombok</groupId>
        <artifactId>lombok</artifactId>
    </dependency>
</dependencies>
