开通OSS云服务
1). 通过控制台找到对象存储OSS服务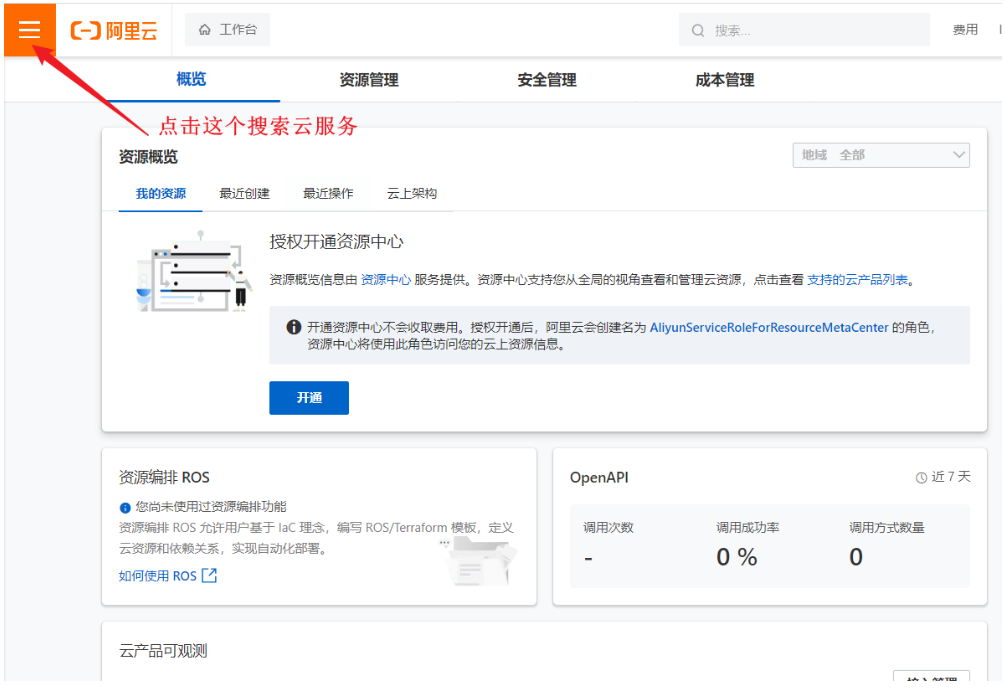
选择要开通的服务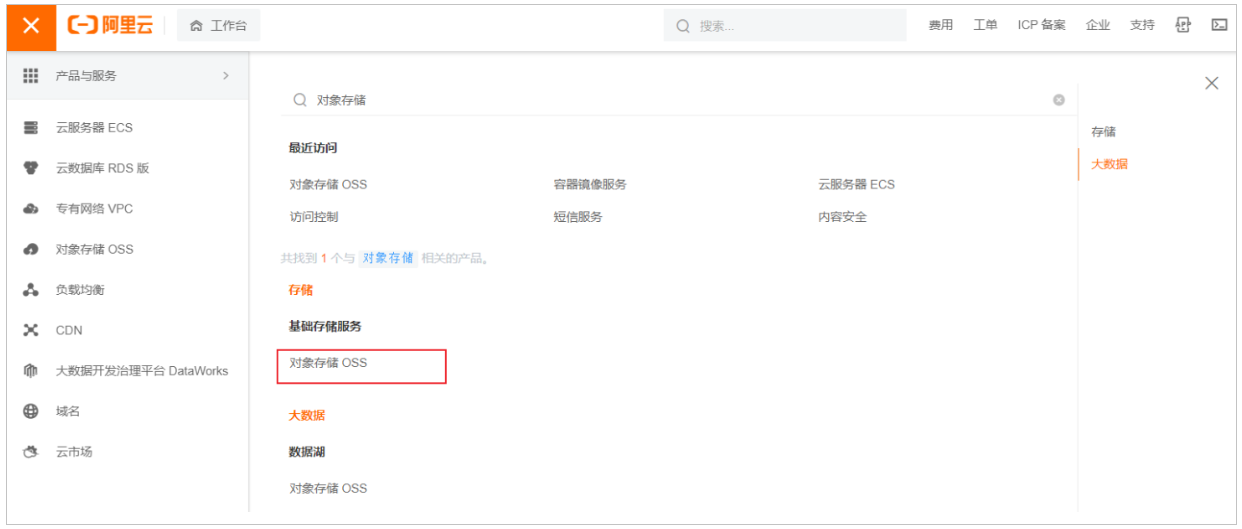
如果是第一次访问,还需要开通对象存储服务OSS
2). 开通OSS服务之后,就可以进入到阿里云对象存储的控制台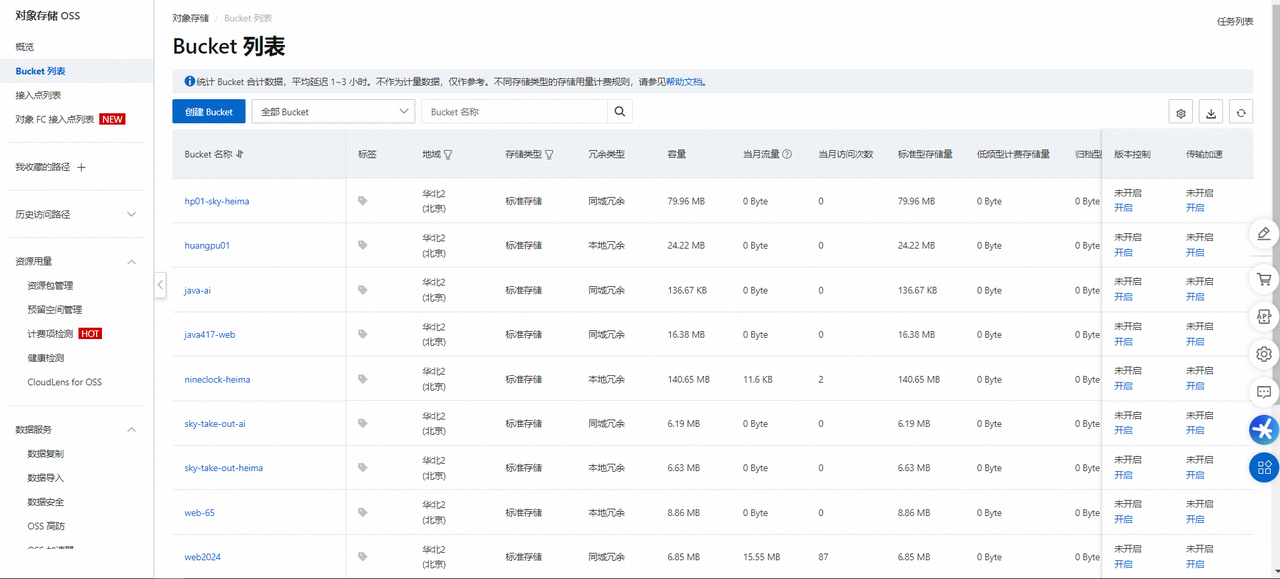
3). 点击左侧的 "Bucket列表",创建一个Bucket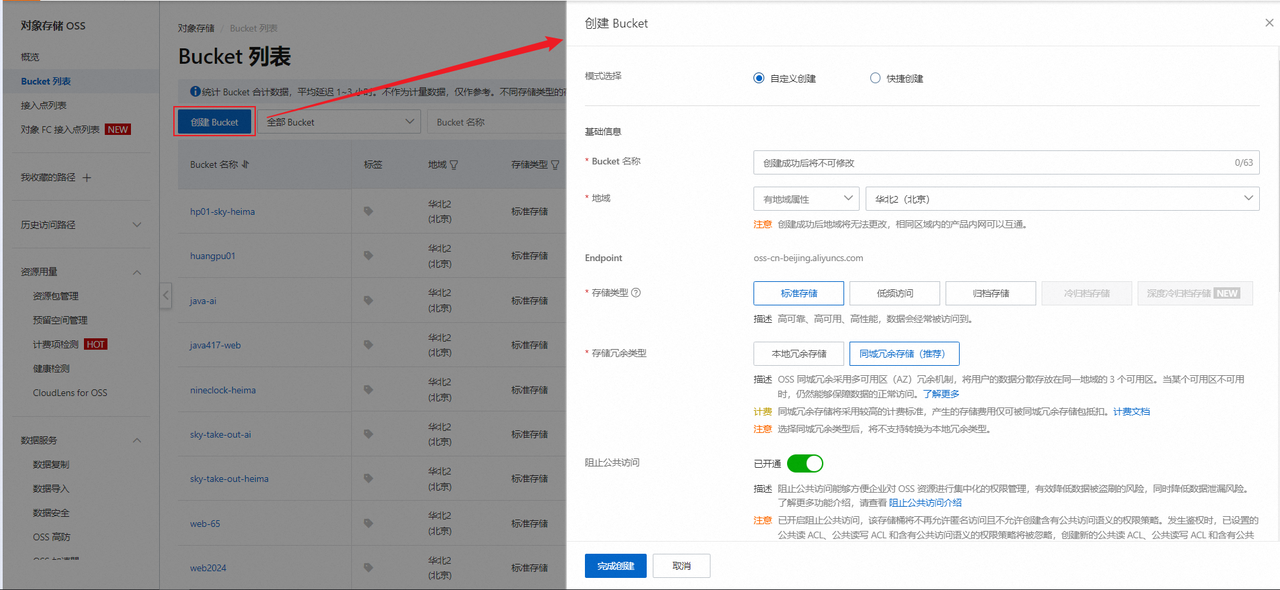
输入Bucket的相关信息.最新版的公共读不能在这里设置,完成创建后在权限控制里可以设置。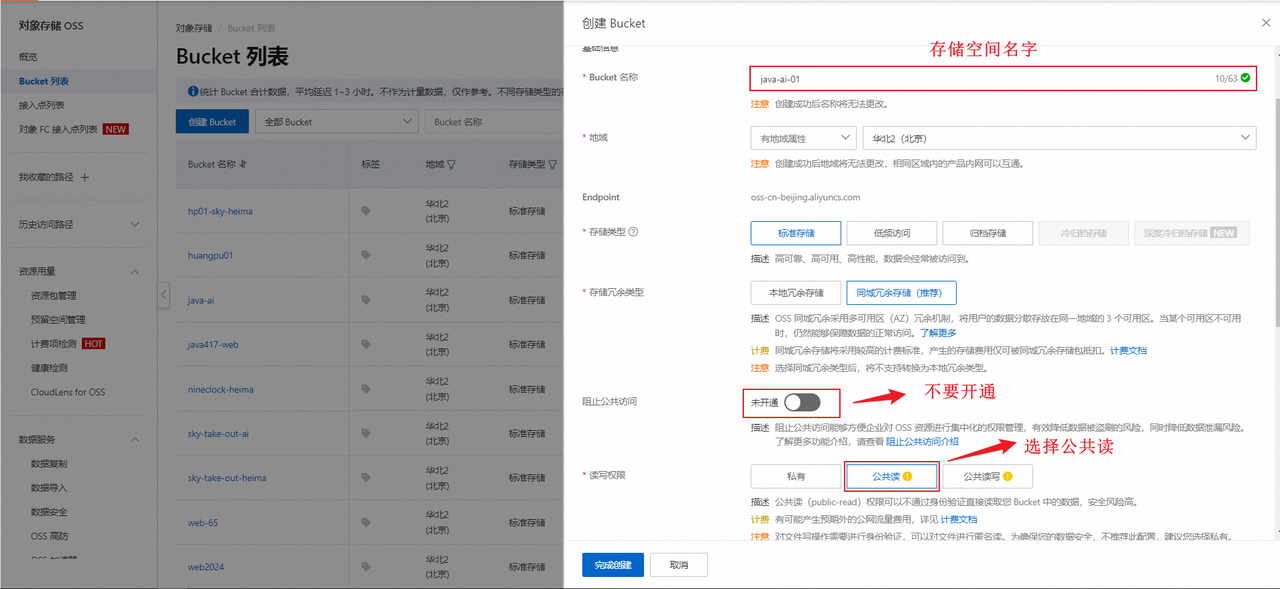
其他的信息,配置项使用默认的即可。
配置AK & SK
1). 创建AccessKey
点击 "AccessKey管理",进入到管理页面。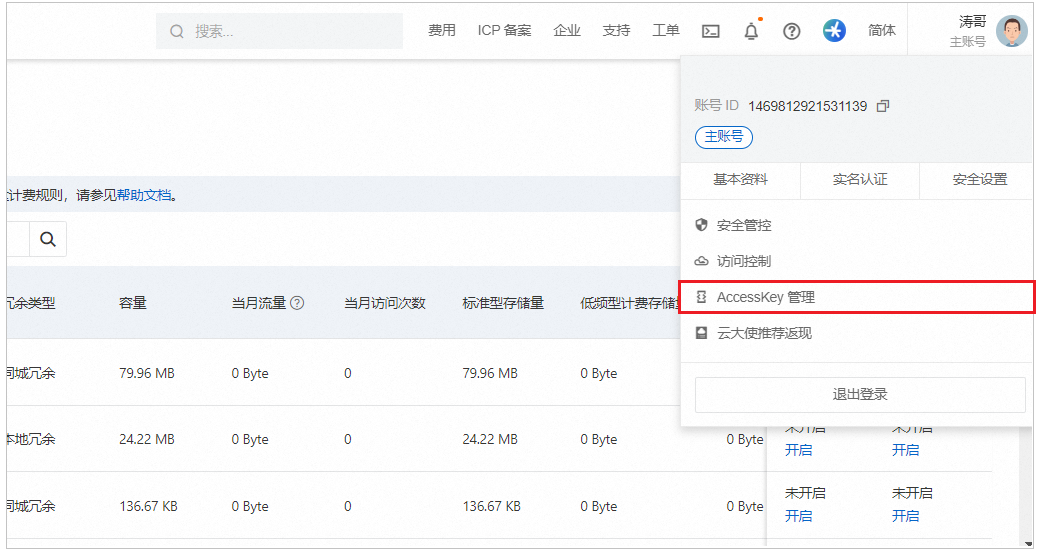
点击 "创建AccessKey"。
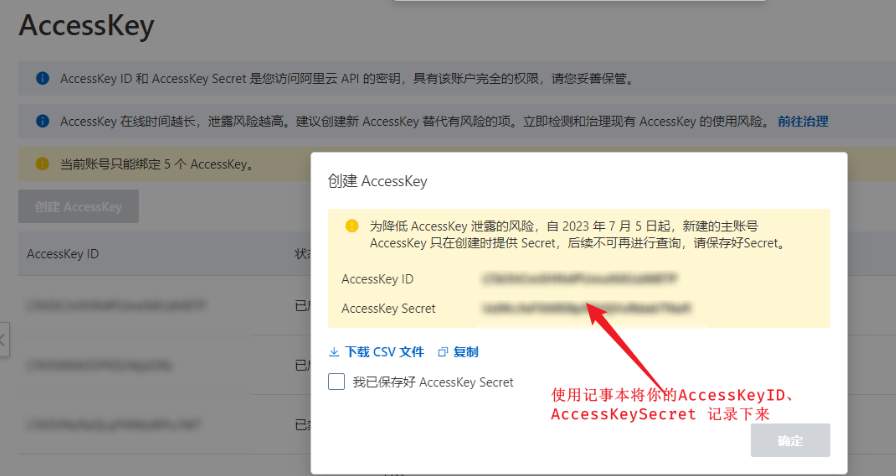
2). 配置AK & SK
以管理员身份打开CMD命令行,执行如下命令,配置系统的环境变量。
set OSS_ACCESS_KEY_ID=xxxxxxxxxxxxxxxxxxxxxxxxxxxxxxxxxxxxxxxxxxxx
set OSS_ACCESS_KEY_SECRET=xxxxxxxxxxxxxxxxxxxxxxxxxxxxxxxxxxxxxxxxxx
注意:将上述的ACCESS_KEY_ID 与 ACCESS_KEY_SECRET 的值一定一定要替换成自己的。
执行如下命令,让更改生效。
setx OSS_ACCESS_KEY_ID "%OSS_ACCESS_KEY_ID%"
setx OSS_ACCESS_KEY_SECRET "%OSS_ACCESS_KEY_SECRET%"
执行如下命令,验证环境变量是否生效。
echo %OSS_ACCESS_KEY_ID%
echo %OSS_ACCESS_KEY_SECRET%
重启idea生效
入门
阿里云oss 对象存储服务的准备工作我们已经完成了,接下来我们就来完成第二步操作:参照官方所提供的sdk示例来编写入门程序。
首先我们需要来打开阿里云OSS的官方文档,在官方文档中找到 SDK 的示例代码:
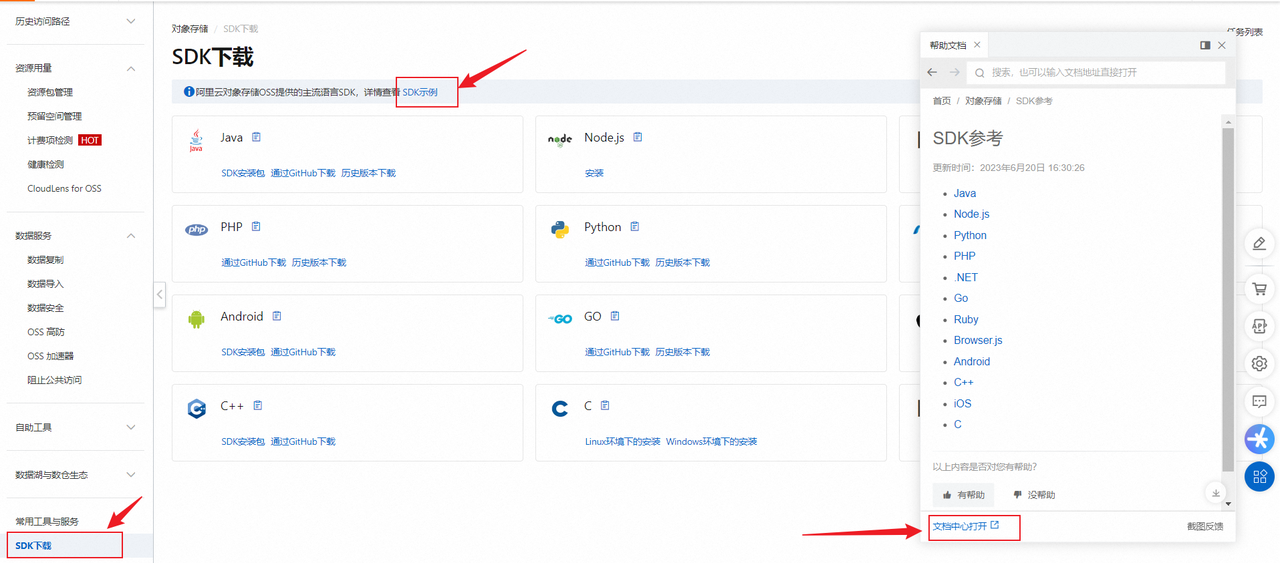
如果是在实际开发当中,我们是需要从前往后仔细的去阅读这一份文档的,但是由于现在是教学,我们就只挑重点的去看。有兴趣的同学大家下来也可以自己去看一下这份官方文档。
参照文档,引入依赖:
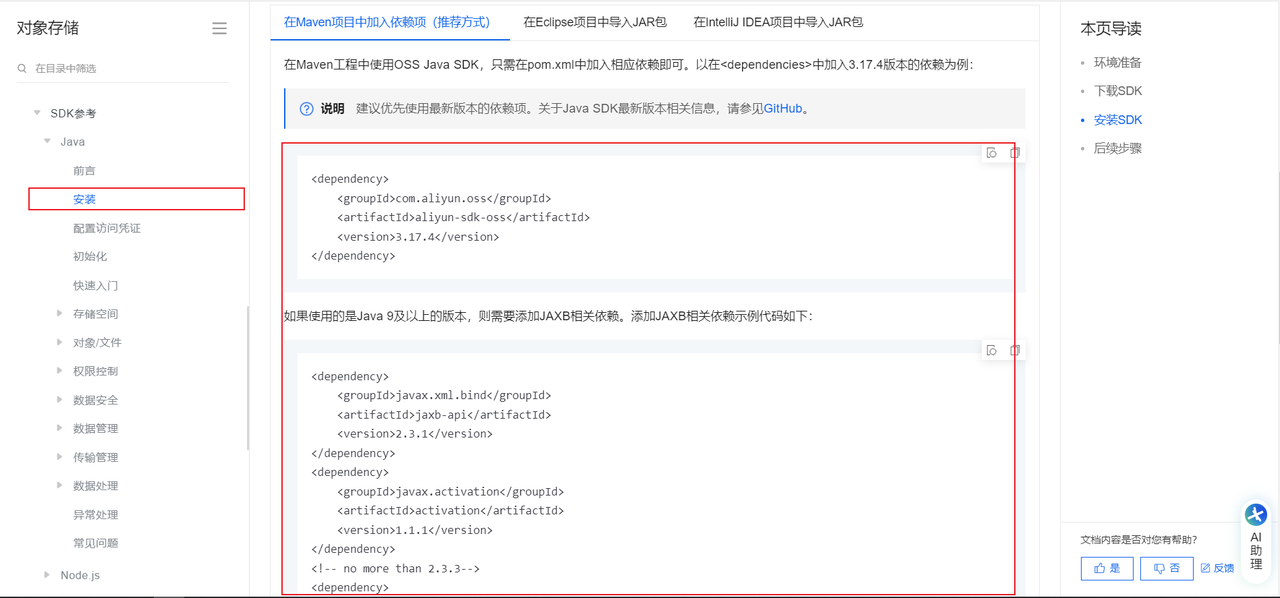
<dependency>
    <groupId>com.aliyun.oss</groupId>
    <artifactId>aliyun-sdk-oss</artifactId>
    <version>3.17.4</version>
</dependency>
<dependency>
    <groupId>javax.xml.bind</groupId>
    <artifactId>jaxb-api</artifactId>
    <version>2.3.1</version>
</dependency>
<dependency>
    <groupId>javax.activation</groupId>
    <artifactId>activation</artifactId>
    <version>1.1.1</version>
</dependency>
<!-- no more than 2.3.3-->
<dependency>
    <groupId>org.glassfish.jaxb</groupId>
    <artifactId>jaxb-runtime</artifactId>
    <version>2.3.3</version>
</dependency>
参照文档,编写入门程序: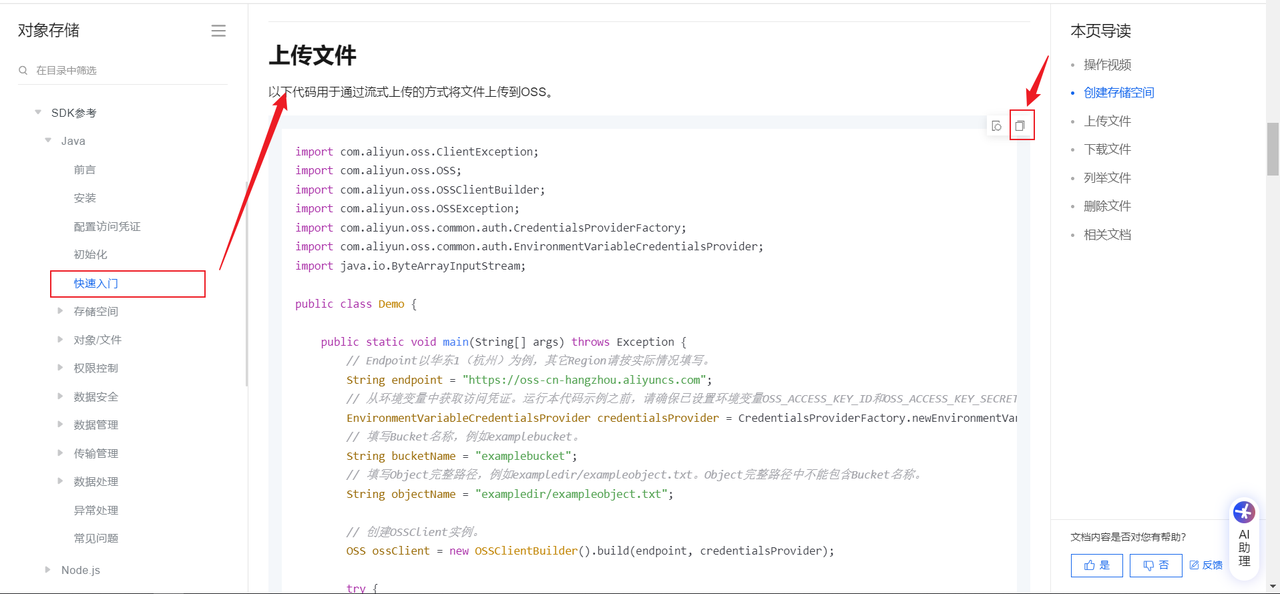
将官方提供的入门程序,复制过来,将里面的参数值改造成我们自己的即可。代码如下:
public class Demo {

    public static void main(String[] args) throws Exception {
        String endpoint = "https://oss-cn-shenzhen.aliyuncs.com";
        EnvironmentVariableCredentialsProvider credentialsProvider = CredentialsProviderFactory.newEnvironmentVariableCredentialsProvider();
        String bucketName = "possible10";

        OSS ossClient = new OSSClientBuilder().build(endpoint, credentialsProvider);

        try {
            // 上传本地文件
            String localFilePath = "C:\\Users\\19355\\Desktop\\image\\background.jpg";
            File file = new File(localFilePath);

            if (!file.exists()) {
                System.out.println("文件不存在: " + localFilePath);
                return;
            }

            // 获取当前年月作为文件夹名
            LocalDateTime now = LocalDateTime.now();
            String yearMonth = now.format(DateTimeFormatter.ofPattern("yyyy"));
            String month = now.format(DateTimeFormatter.ofPattern("MM"));

            // 构造OSS对象路径: 2025/09/background.jpg
            String objectName = yearMonth + "/" + month + "/background1.jpg";

            PutObjectRequest putObjectRequest = new PutObjectRequest(bucketName, objectName, file);
            PutObjectResult result = ossClient.putObject(putObjectRequest);
            System.out.println("文件上传成功,路径: " + objectName);
        } finally {
            if (ossClient != null) {
                ossClient.shutdown();
            }
        }
    }
}
切记,大家需要将上面的 endpoint ,bucketName,objectName,file 都需要改成自己的。
在以上代码中,需要替换的内容为:
- endpoint:阿里云OSS中的bucket对应的域名
- bucketName:Bucket名称
- objectName:对象名称,在Bucket中存储的对象的名称
- file:文件路径
运行以上程序后,会把本地的文件上传到阿里云OSS服务器上。
